

Star Trek Enterprise Refit

Shuttle bay

Shuttle bay

Shuttle bay

Shuttle bay sealed and ready to install into secondary hull

Shuttle bay LED installation progress

Shuttle bay sealed with LEDs installed

Shuttle bay LED installation progress

Planning on LED placements

Top saucer LEDs installed and light blocked

Bottom saucer LEDs installed and prepared for light blocking

Bottom saucer primed ready for pre-shading

Top saucer primed ready for pre-shading

Bottom saucer pre-shaded ready for base colour

Top saucer pre-shaded ready for base colour

Top saucer masked with positive aztecs in a checker board pattern

Top saucer masked with positive and negative aztecs in a checker board pattern

Bottom saucer masked with positive and negative aztecs in a checker board pattern

Top saucer with multi-layered flat and iridescent colours. Ready for detail painting and decaling

Top of the saucer with multi-layered flat and iridescent colours. Bridge detail colours applied and impulse deck colours almost finished!

Bottom of the saucer with multi-layered flat and iridescent colours. Sensor array colours applied and neck colour detail almost finished!

Secondary hull top LEDs installed and light blocked

Secondary hull left side primed

Secondary hull opened up to allow wires to pass through and primed

Top of secondary hull primed and pre-shaded

Neck primed

Pylons primed

Pylons masked using Aztec Dummy masks

Pylons masked using Aztec Dummy masks

Defector dish LEDs installation

Deflector dish masked using Aztec Dummy masks

Defector dish small strips of styrene detailing

Deflector dish paint masks removed revealing three subtle shades

Deflector dish paint masks removed revealing three subtle shades

Deflector dish light test orange

Deflector dish light test blue

Deflector dish light test orange with RC thruster lights

Deflector dish light test blue with RC thruster lights

Engine nacelles primed

Engine nacelle base coat and masks applied

Engine nacelles complete - inboard view

Engine nacelles complete - outboard view

Testing the nacelle lights

Testing the nacelle warp engine lights and top warp crystal light

Testing the nacelle spot lights

Secondary hull, pylons and neck sub-assemblies added together. Large gaps being filled and sanded back

Secondary hull, pylons and neck sub-assemblies added together. Large gaps being filled and sanded back

Secondary hull strong back painting and masking

Secondary hull strong back painting and masking

Secondary hull strong back masks removed

Secondary hull strong back masks removed

Secondary hull strong back masks removed

Secondary hull aztec masks applied over an iridescent multicolored base

Secondary hull aztec masks applied over an iridescent multicolored base

Secondary hull aztec masks applied over an iridescent multicolored base - top

Secondary hull mated with neck and decals applied - some filling around the neck to smooth out

Completed nacelles ready for attaching to pylons

Testing the lighting FX of all the sub-assemblies!

Testing the lighting FX of all the sub-assemblies!

Testing the lighting FX of all the sub-assemblies!

Top of saucer completed and ready for attaching to neck

Bottom of saucer completed with decals

Top of saucer completed and ready for attaching to the neck

Nacelles mated to secondary hull - just the saucer to add and nearly finished!

Saucer added to secondary hull - a very delicate and nervous step!

Saucer added to secondary hull - a very delicate and nervous step!

Saucer added to secondary hull - a very delicate and nervous step!

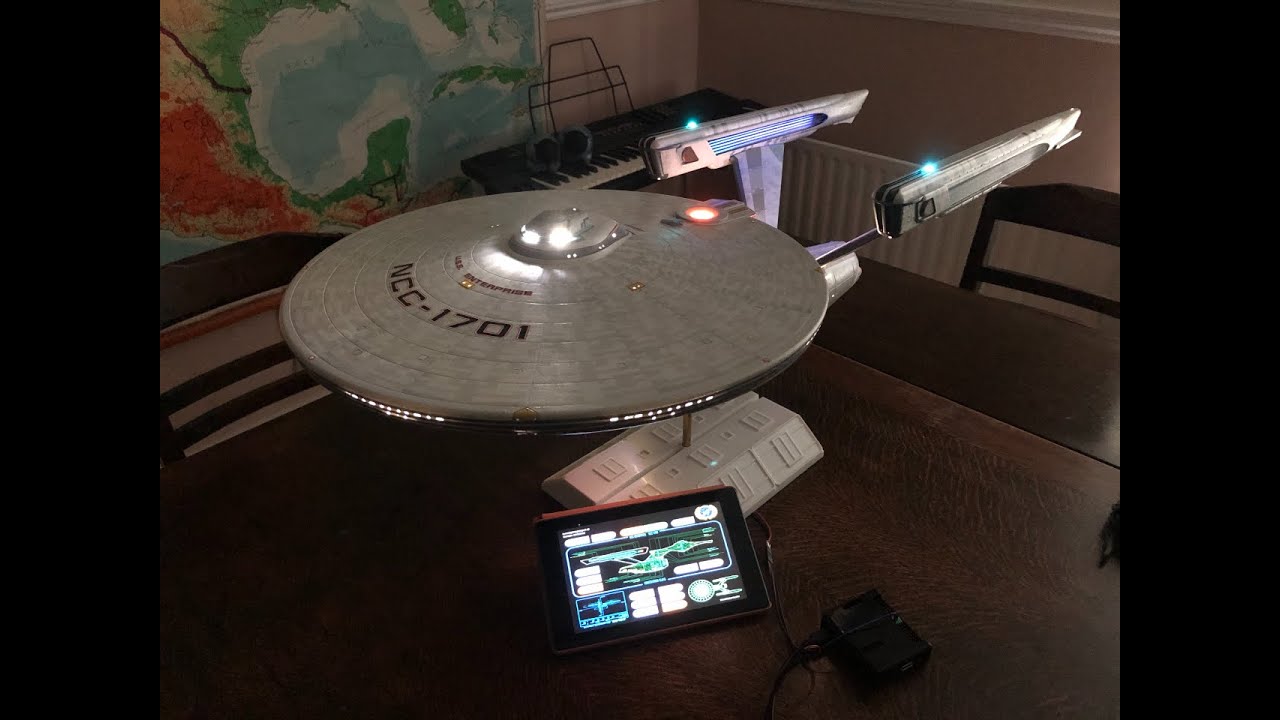
Out of dry dock and free to navigate!

Out of dry dock - rear view

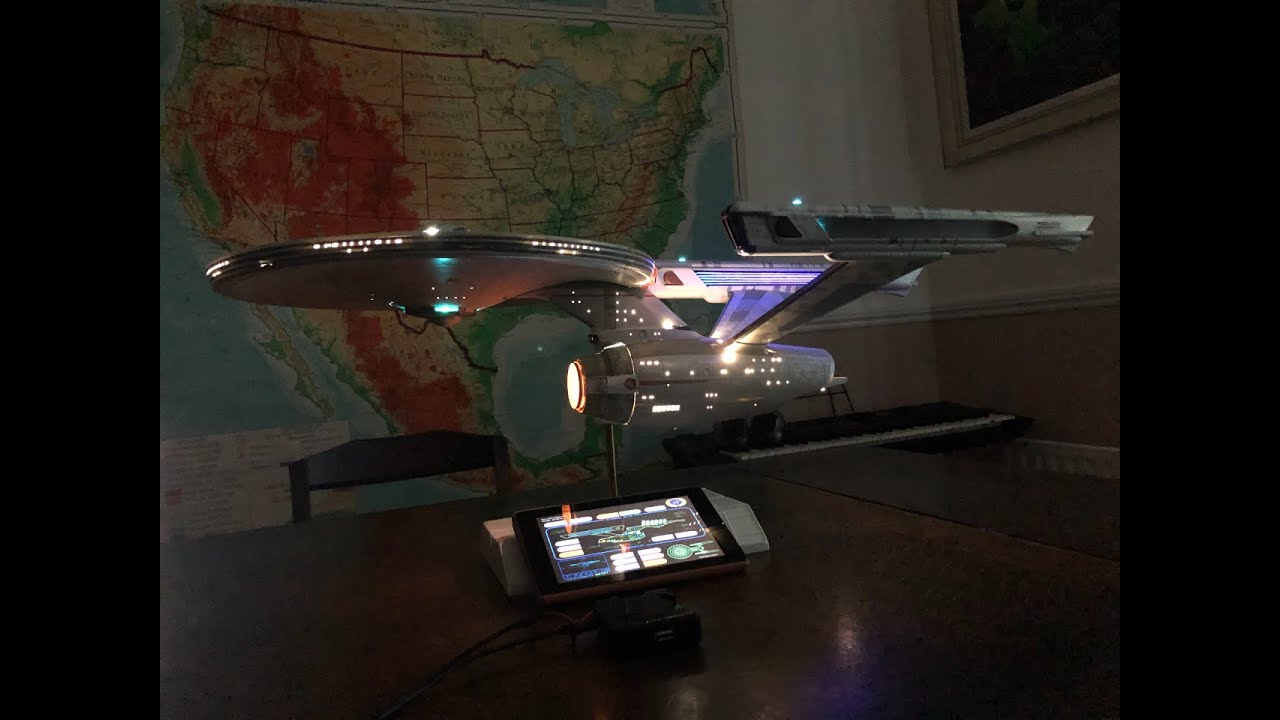
The final assembly and lights in action - overall v happy with the result, but always room for improvement!

The final assembly and lights in action - overall v happy with the result, but always room for improvement!

The final assembly and lights in action - overall v happy with the result, but always room for improvement!

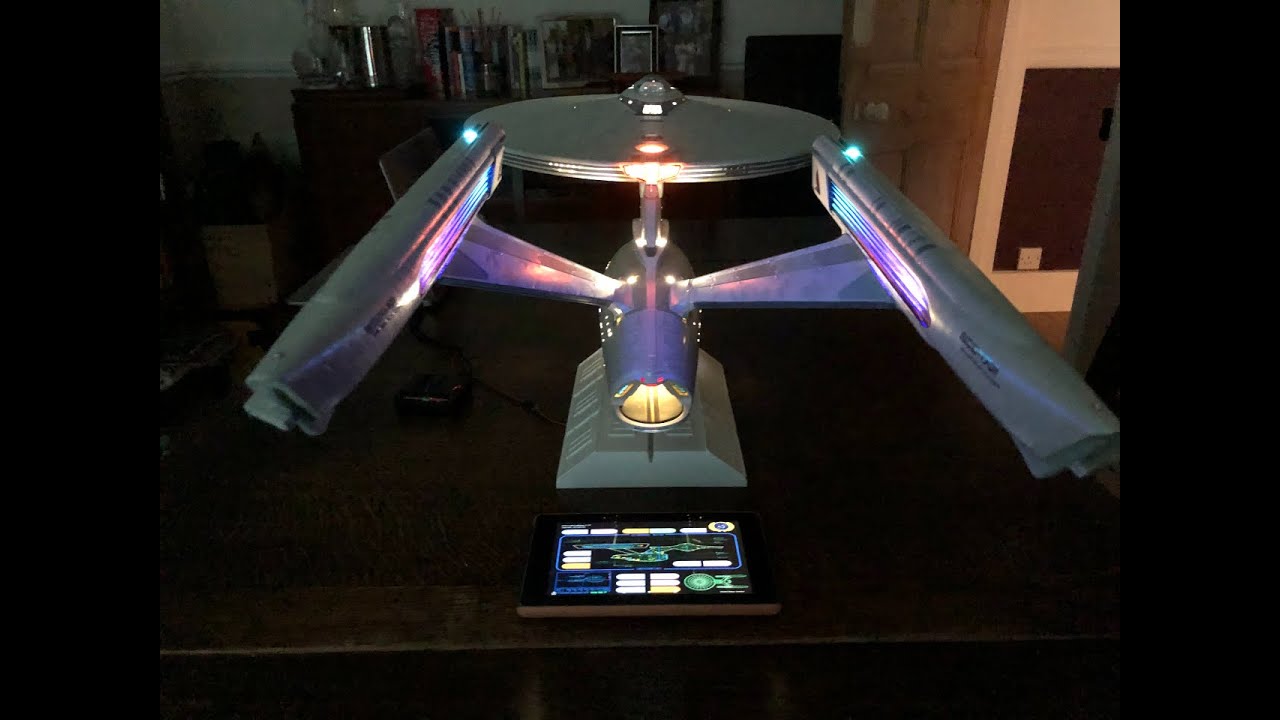
Rear view of the Enterprise with lights

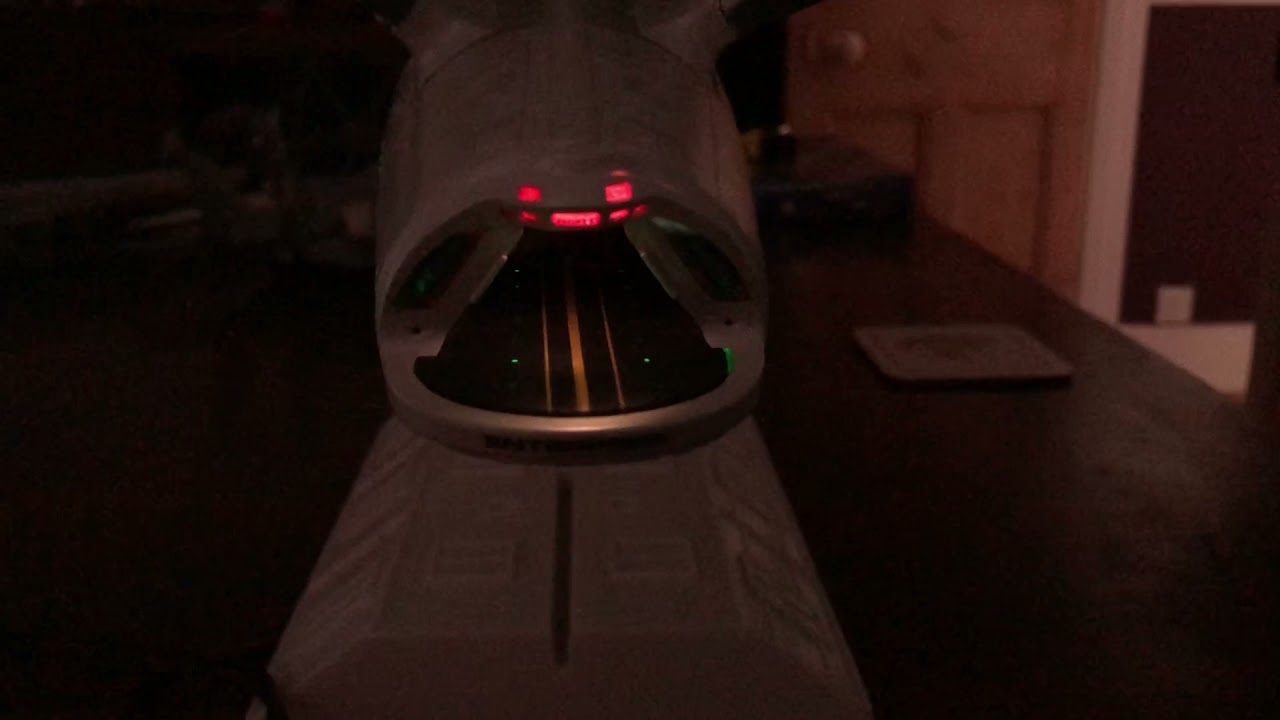
Close up of the lit shuttle bay interior - hard to photograph well on my phone!

Close up of the officers' lounge

Underside of the main saucer with the orange deflector

Polar Lights 1/350 Star Trek Starship Enterprise Refit with custom LED install. App controlled with sound FX.

The final assembly and lights in action - blue impulse engines

Rear view with blue impulse engines

Rear view with blue impulse engines
评论
43 20 February 2021, 17:01
Awesome project! I'd really like to see pics of the photoetched enhancements kit. I'm wondering if they would work with my 50th Anniversary Enterprise from AMT
20 February 2021, 20:06
The photoetch will not be compatible - this build is the refit and the 50th Anniversary kit is TOS (different ship, different kit). However, there are photoetch sets available for the TOS kit.
20 February 2021, 20:42
JD, these photoetch kits can be tricky to get hold of in the UK. If you import from the USA there will be taxes as I have found out!
21 February 2021, 10:26
The force is strong with this build!😉 I cant wait to see the 1st light test. 👍
26 February 2021, 07:51
Thanks Stephan! I'll keep you all posted, though a fair way to go yet!
26 February 2021, 16:10
Where the hell did you find aftermarket masking tape for the Aztec pearlescent coloring?
I have the paint guide, iirc, but I had the impression that there weren't any masking products available, but I guess on second thought, it's been a while since I've looked for that.
22 March 2021, 22:24
I'm using the Aztec Dummy 1/350 refit masks which I got via the CultManTV website, based in the US. I've got both the main masks (for a two-tone effect) and the pattern enhancer set to add the iridescent shimmering panels. I believe Orbital Dry Dock also offer a good masking solution. I'll probably make a wooden base for this as the kit one is a bit nasty!
22 March 2021, 22:46
@Treehugger, there are different mask sets currently available from Aztek Dummy, MaskDesign, and Orbital Drydock.
22 March 2021, 22:56
I have a question Steve, after the fibers are passed through the holes and fixed into place, you just paint over them, and then trim the extra flush to the body? How do you get a nice clean finish?
11 April 2021, 19:44
Thanks guys. The aztec dummy masks are good, but they do take some practice and patience to apply.
11 April 2021, 21:38
JD, I'm not actually using fiber optics for any window lighting. Windows will be illuminated from LED light strips strategically placed throughout the model. However, nav lights, rc thrusters, running lights, phasers etc will use fiber optics. I tend to pass the fibers through the hole, fix and trim. I then mask the tip if needed.
11 April 2021, 21:52
I fix the optics from behind for a cleaner finish. I also tend to melt the the end of the optics into a mushroom/domed shape for a cleaner finish and more diffuse light effect. If you hold a heat source (soldering iron) close, but not touching, the end of the fiber and let gravity melt it downwards to create a dome.
11 April 2021, 21:57
I see, is there a reason you prefer to install the optics and then paint, rather than paint first? I'll experiment, and probably answer my own question..I'm also wondering if you paint over the fibers, will they glow through the paint?? Thanks for letting me pick your ? ?
11 April 2021, 22:21
Depends on the sub assembly at what stage to install LEDs. On this kit the optics are mainly in the saucer which is in two parts. These will need filling and sanding after joining, so makes sense to paint once all the clean up work is done. I guess if you used a very light colour and highly thinned paint, the light might still pass through. Worth experimenting.
11 April 2021, 22:50
Sorry guys I have been a bit quiet of late, but house building work had stopped me from modelling. Back on it now, so I'll update the project with more photos as we boldly go!
8 June 2021, 18:04
I wonder, is there anything that you learned during this project that you want to share? 🙂
8 June 2021, 19:52
What an amazing build! So good in fact, that I wonder if I will ever acquire the patience and skills necessary for such a project..?
9 June 2021, 00:47
Yeah, house building consume pretty good time, nice you're back with this great build 👍
9 June 2021, 03:12
Hi @treehugger I think the main thing I have learned with this kit is that it requires a lot of sanding, filling and finessing to get everything to fit well. Test fitting and patience are def needed!
15 June 2021, 11:23
Thank you all for your kind comments - definitely coming together! This has certainly been a masking marathon of a build
18 September 2021, 21:34
It sort of looks like you are about to finish. I wonder, how much is left of the process?
19 September 2021, 07:36
I reckon a few days and it will be all together, but I also would like to do a nice wooden display base rather than using the stock plastic one. Shame we can't add videos, but I will post video/s on my own Facebook page so you can see the lighting fx
19 September 2021, 08:07
You can post videos, but they need to be hosted externally like YouTube or ImgBB (etc). Then just type the link to your video, like this: Youtube Video

19 September 2021, 12:26
Thank you. I'll do a video with all the lights working etc, once I've done the finishing touches
23 September 2021, 15:32
What can I say? This is what I hope to achieve someday.. My hat is off to you sir. The end result is a beautiful piece of eye candy, and reminds me that I still have a long way to go to get there.. 🤩
26 September 2021, 21:53
Truly fantastic job and that without counting the lights.... and you said there is room for improvement? wow. i want to see that 🙂
26 September 2021, 22:06
Thank you guys for the positive comments. It has been a long build and certainly the biggest kit I'm ever likely to build! I'll try and do some videos soon.
26 September 2021, 22:31
Super job! One of the best I have seen with this kit. Congratulations.
27 September 2021, 07:57
Thank you guys - really appreciate your comments. I found this kit challenging re the fit of the parts, but with a lot of filling, sanding and patience I got there
27 September 2021, 08:10

Here's an easier to see view of the shuttle bay runway lights in action which is hard to see in the longer video Youtube Video
27 September 2021, 15:47
Here's another video with some more lighting and sound fx Youtube Video
21 October 2021, 18:38
A final video showing some of the start-up sequence - sorry for slightly iffy video! Youtube Video
21 October 2021, 18:40
Thank you guys. This was an EPIC build which took 10 months in total. I need a lie down 😉
22 October 2021, 07:16
Let me get you some Romulan Ale sir.. You have inspired us all, and have certainly earned the rank of Admiral in the craft of Starship modeling! Hip Hip Hurrah! Live long and prosper! 🖖
22 October 2021, 07:27
It's a good thing you posted work-in-progress photos or Paramount Pictures might be knocking on your door wanting their studio miniature back! Nice job!
22 October 2021, 13:35


