
Newsfeed-
a adăugat un nou photoalbum.
46 imagini
F-16A Block 15 OCU Indonesian Air Force (TNI AU)
1:48
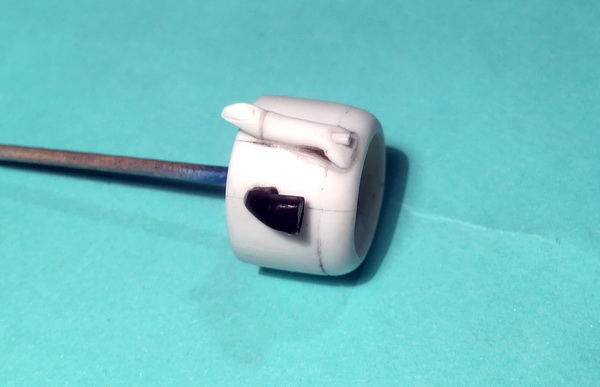
Test fitting the intake so as to ensure the paintjob is ok.


Proiect: F-16A Indonesian Air Force


45 28 July 2016, 21:23
Italeri's F-16 is a rather modest kit, seems quite good for a beginner. For the non beginner however, it poses a challenge in order to be built correctly. At first there is a 2 mm misalignment of the top panels to the rest of the top fuselage half. Then, it seems that the fuselage is bit shorter than a Hasegawa F-16, and finally the radome is also shorter. All that translates to about 3.5 mm shorter overall length than Hasegawa's F-16.
There is also a misalignment of the instrument panel cover.
Since I am not in rescribing yet, I decided to push forward the top of the fuselage part and remove a little bit of plastic where the front of the canopy rests. I also removed the instrument panel cover. All the cockpit interior will be replaced by Hasegawa's cockpit. Italeri's cockpit resembles more a block 1-5 aircraft.
28 July 2016, 21:49
Slow progress on this one. Hasegawa instrument panel cover has been glued into place. Some dryfiting, still some issues to be sorted.
24 February 2018, 21:44
Cockpit glued in place. The instrument panel is about 1mm away from the instrument panel cover. It just wouldn't squeeze further up. But I am satisfied with the result. The HUD projector lens was constructed with some Micro Krystal Clear and aluminum foil underneath it. It looks ok I think.
Next will be the main wheel bay subassembly. Lot's of dryfitting there, there are some gaps there too.
9 March 2018, 18:45
Thank you Clifford.
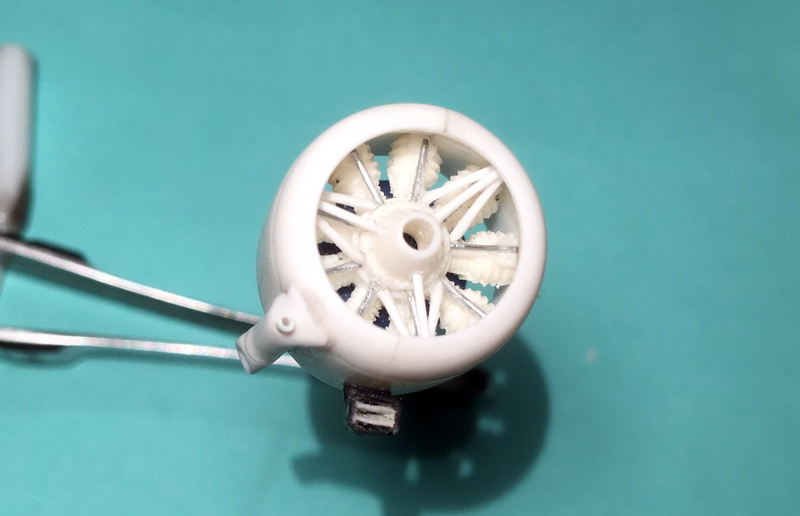
One other thing that needs fixing is the engine nozzle. Well, you can't fix it actually...! The F100 engine, built by Pratt and Whitney, has 15 turkey feathers. The F110 engine, built by General Electric, has 12 turkey feathers. Both engine nozzles in Italeri's kit have 14 feathers!!! So I am going to use a nozzle from Hasegawa's kit, since they will be built as Block 40/50 machines.
13 March 2018, 20:23
Welcome Jos. I have been working on and off. Some wiring has been added to the main wheel bays, maybe I'll post a photo or two. My attention is on the Spangdahlem Viper, I have been working on the bits and pices (canopy, landing gear, seats) left. Yesterday I got her on her feet.
4 January 2019, 08:14
Can't wait for the reveal pics Maciej 😄 👍! For your reference, I build an exotic Viper two years ago:
scalemodels-jansen.j..odels/f-16c-block-25
18 January 2022, 11:53
I remember your build quite vividly Jos. The bird is a stunner!
18 January 2022, 17:30
LOL at pic #21 and #22 😄
Maybe the pilot could use his head too, somewhere 😉
Good progress, Maciej, can't wait for more 👍
21 January 2022, 06:51
Sergej 😄
Thank you Robert and welcome!
While waiting for the putty on the Eurofighter to dry, I started tackling the intake. It is the biggest hurdle in this kit.
21 January 2022, 08:24
In order to have some decent progress on the intake, I got some work done in the wheel bays. More wiring needed before I glue it in place.
27 March 2022, 12:03
I build this kit not so long ago and I know it's a rough build. You did much more than me to fix the problems. Very nice to follow this.
27 March 2022, 17:42
Yes Vincent it's a rough kit and you did yours justice. You made some nice additions behind the seat as well as the oxygen hose looks good and I will try to copy them.
27 March 2022, 18:00
Thanks Maciej. The detail on this kit really needed some scratch building. That was one of the fun parts. Good luck with the rest of your build.
27 March 2022, 18:08
Welcome Ben!
Thank you Clifford. Since I lost the mojo on the Su-57 for the time being, I grabbed the old builds. The goal on this one is to at least close up the fuselage.
28 March 2022, 11:53
Not much to brag about after all these days, the right hand side of the wheel bay got its wiring and extra detail. Some wiring will be added when the landing gear will be put in place.
9 April 2022, 07:19
After sanding the outer surfaces of the air intake I dryfitted the hand made upper part of the air duct. The kit doesn't have one so I had to make one. Lots of putty and sanding to follow and painting obviously after that. I think it is a good step forward.
14 April 2022, 18:58
Welcome Panteli!
Thank you WhiteGlint, still some work to do though.
25 April 2022, 15:00
Main gear bay done! The battery will be added when the bay will be glued to the fuselage. The rest of the wiring will be added when I attach the legs.
6 May 2022, 22:25
Thank you Clifford! Still smoothing out the filled gaps. The first try was so and so and there are a couple of holes to fill.
12 May 2022, 10:37
After spending summer with touching any piece of plastic, some progress on the intake. The photos fail to show what's happening further deep, but all in all I think it'll do. Some issues here and there, might be sorted out, or might not. I'll see.
25 September 2022, 14:13
Thank you Clifford! I think I have come to an acceptable result on the intake trunk.
Since the paintjob is a wraparound camo, I decided to paint the intake and its surroundings before glueing it in place. Much easier me thinks. I will apply some gloss varnish too so as to have it ready for decals later on.
Next big step will be closing the fuselage and masking the canopy. After that I think it will be a straightforward build.
4 October 2023, 10:03
Agree with Clifford - intakes are perfect. One question - why did you cannibalize a Hasegawa F-16 for an Italeri?
14 March 2024, 22:18
Welcome Guy!
Thank you CaptGPF. That's a good question. I have 3 Hasegawa twoseaters plus some spare tubs and I have an Aires cockpit to use in one of them. So I used a spare tub and I cut off the front instrument panel cover and used them in the Italeri. Yeah, I know it will a pain fitting the aires tub in the hasegawa, but it will be a great improvement over the hasegawa tubs.
As for cannibalizing the Hasegawa, wait until I start building one of them, it will be a carnage!
1 15 March 2024, 07:15
After a lot of back and forth, I finally got to glue the intake in place. At first I had to apply a gloss varnish in order to do some line wash. After that I used a satin varnish and then I waited a bit before I went on with the glue. In order to have a good bond, I carefully scraped the paint (kind of nervous with that). Glueing it after that was a piece of cake.
As I suspected, it would have been difficult to paint it if glued unpainted. Quite the effort but I think it was totally worth it.
Welcome Cristian A!
3 June 2024, 20:22
Thank you Seb! I have to pick it up, I've been dragging myself with another project, hoping it would be easier or faster, but it stalled too. Darn!
1 August 2024, 19:46
Oh wow Ronan, glad you like it! Sorry if I missed the other likes guys, the feed only shows the last guy who pressed the button.
12 August 2024, 11:02
Looking for a 1/48 Pro-Modeller F-4E Phantom. Hit me up if you have one you wish to part with. Thanks!
19 April, 16:16


a adăugat un nou photoalbum.


24 5 April, 17:33
Starting a very rare bird. (I am getting bored with the other 9 builds I have still in progress).
2 5 April, 17:42
Nice project Skyhiker 👍👍 you build alot of Soviet stuff, don't see to many of these... nice choice 😃👍
14 April, 12:40
Thanks Dave. It took me a while to get the riveting done. Hopefully after priming I won't have to do it again.
17 April, 17:41
a adăugat un nou photoalbum.
24 imagini
Airfix 1/48 Gloster Meteor FR.9
1:48


Proiect: 1:48 Early RAF Cold War


 7+
7+ 15 7 January, 19:54
Thanks Felix and Mark. It is now complete, just need to get some photos done.
1 1 April, 20:35
a adăugat un nou photoalbum.
17 imagini
D-Day Air Assault Set
1:72
Started on the Typhoon. Quite scary cutting the holes in the wings!


Proiect: D-Day Air Assault Set


7 8 April, 08:49


What Product Type should items like this belong to? I would suggest "Materials"; the same would go for all sheets of stone work, bricks, corrugated metal, etc.
Cobblestone (MIG Productions MP 72-085, 1:72)
")
Cobblestone (MIG Productions MP 72-085, 1:72)
Implementat
1 19 April, 04:31
I put them in "Detail sets", using "Materials for the likes of:
Grass Flock 2mm Dry (AK Interactive AK8223, No)
Ballast - OO Scale Granite G..g) (Gaugemaster GM114, 1:76)
The problem is, there is no way to ensure that someone puts them under the "correct" topic, as it's a matter of interpretation.
")
 (Gaugemaster GM114)")
19 April, 08:12
I wanted to say "display bases" just based on the packaging.
While materials would not be incorrect either; "detail set" is for now the best
But agreed there is room for interpretation
1 19 April, 08:37
But items like the following has to come under Materials as well: it is just "raw materials" that need cutting and shaping and to put it under either Display Bases or Detail Set would be wrong, in my view.
Dressed Stonework (WILLS SS MP 202, 1:76)
")
19 April, 15:52
a adăugat un nou photoalbum.


22 26 February, 15:27
Thanks! I picked up a bunch of these Planet Models kits a while back as they tend to be of interesting subjects avoided by other kit manufacturers. It seems to be a fairly decent, simple kit. I needed a break from a couple of other models that I'm working on. This box kept falling off the shelf so I figured it was telling me that I should pick it to build!
26 February, 20:38
I have the Aichi H9A1 from this brand in my stash. I hope to build someday.
The good thing about your kit is that it includes most of the parts in injected plastic (I think from the MPM mold) since it is a conversion. I didn't know that Planet Models had kits like this 👍
1 27 February, 19:36
Yes, I think you're right that it's from an old MPM kit of another similar plane. As you can see, it replaces the fuselage halves, cowl, and a few other parts in resin (and I think one in clear plastic). It's actually going together fairly well. I did have a problem last night where once you join the wings to the fuselage, you have these tiny square gaps that are covered with some small square kit parts. Well I had everything all assembled and was doing the last square part, and it fell into the fuselage and got stuck at the far end of one of the wings. Let's just say a few naughty words were said. Thankfully I was able to pop off the wings fairly easily (nice thing about using CA to join the plastic wings to the resin fuselage) and dig out the part.
I have a few other Planet Models kits that I picked up for fairly inexpensive prices over the last couple of years. I might do the SNC-1 Falcon alongside this one since they both have yellow wings. The SNC-1 is an all-resin kit though.
SNC-1 Falcon (Planet Models PLT107, 1:48)
")
27 February, 20:51
Nice aircraft 👍
If you prefer it in plastic, you have the Kora model in 1/72 scale:
SCM Search: 1:72 kora SNC-1*
Or Dora Wings ones model in 1:48 scale:
Curtiss-Wright SNC-1 Falcon II (Dora Wings DW48041, 1:48)
")
1 28 February, 19:20
Thanks Cuajete, the Dora Wings kit looks very nice. I'll start with the Planet Models kit and see what happens. I tend to use a lot of aftermarket with my builds, so building with resin doesn't bother me too much.
Back to the Gamma 2J, there is very little out there on this plane. The 2J was a single production trainer, and there was a 5D model that went to Japan. Very few pictures, etc., so I looked at the A-17 which was a very similar plane. While looking at the A-17, I came across this old MPM kit of the A-17 from 2002. It's definitely the base kit that was used for the plastic parts of the Planet Models Gamma 2J/5D kit.
A-17 (MPM Production 72504, 1:72)
")
1 1 March, 17:02
Great, Landlubber Mike! 👍
The union of the plastic with that resin looks very good 👍
1 1 March, 18:56
Thanks Cuajete! And thank you for following Robert!
Yesterday I worked on the canopy. It's a tricky part as the back part of the canopy piece actually serves as part of the fuselage. So, it's been a little tricky figuring out how to cut it out from the clear plastic sheet. Thankfully the kit gave four canopies. Two are used for the 2J and the other two for the 5D -- but it's unclear which is used where from the instructions, and the only thing I see that's different is a little bubble near the front of the canopy. I used one that had a scratch on it as the test piece. I then used a second to get a close approximation, but the third piece seems to work the best. Unfortunately the kit doesn't give any masks, so I've been spending a lot of time masking the various window panes. Hopefully will have that done today, and will be able to start with the primer coat this evening.
1 2 March, 16:58
Thank you Cuajete! Took me a while to get here but I like the colors on this one. Tonight I'm hoping to get the decals on.
1 28 March, 00:23
Nice job on the yellow wing planes. I have a few in my collection(MPM A-17 in my stash). One thing is that your primer (I use white) must be perfect as the yellow tends to show any imperfections in the primer as it is so translucent (reds have the same problem).
19 April, 15:50
")
a adăugat un nou photoalbum.

5 2 March, 12:07
Ciao. Questi sono i colorí descritti nelle istruzioni del kit di montaggio tamiya xf66 una parte + bianco in 3 parti
E poi xf19 + bianco in 2 parti
19 April, 15:28
")
a adăugat un nou photoalbum.
75 imagini
Easy (and simple) Ones
1:different
Tachikawa Ki-36 "Kisaragi" (Fujimi, 1:72)


Proiect: Easy (and simple) Ones


 42+
42+ 148 23 October 2021, 17:43
That's a great way to always have space for just one more in your evolving collection 👍 Your friends and their children most be pleased as punch to have such lovely momentos of their visits. I bet your generosity is kick-starting new modellers' hobies 🙂👍
23 October 2021, 20:37
Great idea to have built models on hand as giveaways, to infect a new generation 😄 👍
23 October 2021, 22:08
I just started modeling in January 2021 and am enjoying how the more models you complete the less precious each becomes which permits more experimentation and play.
24 October 2021, 02:34
Thank you all, Mates, for your kind words.
@Bruce: In fact, one of these boys now assembles Zvezda 1/100 snap-fit tanks himself, and is eager to try more complex kits 🙂
24 October 2021, 10:04
Very cool. Love these kits too. Let me guess why my Komet is the same set and 'camo'? 😉
24 October 2021, 11:28
Also good job getting the kids interested, we need more modelers. Can anyone remember those days of innocence when this was mainly a kids hobby, and you would get a new kit with your allowance, and build the kit in a weekend, and not a bunch of middle aged men spending hundreds of dollars, and weeks and months just building one kit
24 October 2021, 15:26
I can certainly remember trying to clean enamel paint off a cheap brush, on newspaper, and having no idea that thinners or brush cleaner even existed! So many memories of every single kit built 🙂👍
24 October 2021, 15:47
@Mike and Bruce - that's why from time to time I just need to assemble some kit not taking care about (too much) detailing and weathering, etc. 😉
24 October 2021, 17:12
Nice build, Robert. A good replica of that yellow wing flyer. Cheers!
24 October 2021, 17:26
Your 'easy ones' build collection is kind like what I am doing with low-cost 1:72 kits to try out different techniques. Most of your builds are on my agenda. 👍
24 October 2021, 17:41
... and kudos for the latest addition, that lovely (and a personal favorite of mine) SG-38/Eton... 👍 👍 😉
9 May 2023, 18:33
I am happy you like it, Mates. Thank you for your kind words!
9 May 2023, 19:59
Such a pleasure to look through your beautifully presented album, Robert.
9 May 2023, 20:10
This glider is especially important to me because it reminds me of my childhood when my father made a flying version of it. You've done a very good job with it.
10 May 2023, 16:37
I heartily endorse this approach!...what a good way to have a diversion and some experimentation...we scientists do it all the time, and it should be applicable to model making!
Excellent standards too!- despite the fact they're 'shake and bakes'...
27 July 2023, 09:06
A very nice collection with a building philosophy that inspires.
Great work!
28 July 2023, 09:45
REally nice Leo!! Good work Robert!
How was the assembly and quality of the kit?
I plan to do the same, only in the version of the Austrian Armed Forces;)
28 July 2023, 14:23
Thank you, Simon, I feel honoured by your praise 🙂 The kit is simplicity itself, can be assembled in no time. Fit is just perfect - it is almost a snap-fit kit.
28 July 2023, 15:59
A really beautiful collection! You reminded me my childhood, when me and my uncle visited his good friend, he always had a nice little gift to give me. He was mainly worked with matchbox 1:76 kits. Thanks for sharing!
30 July 2023, 07:54
Stunning presentation on the A5M. You've done the old workhorse proud.
6 October 2023, 18:18
Nice collection of tryouts Robert, I had somehow missed this album before?
28 October 2023, 12:16
Thanks, Jan 🙂 I just upload here photos of the newly finished kit from time to time...
28 October 2023, 12:40
Thanks, Łukasz, much appreciated 😉 Generally, printing is quite good - no visible layers and the level of detail is awesome (due to this I lost the tiny rear-view mirror to my carpet monster at the stage of removing the technological supports - I just did not notice it... On the other hand, a few technological supports touch the sides of the cabin - you can easily spot their remains - practically impossible to remove for me. Also the tarpaulin supports and benches are printed together in situ, what makes cleaning the whole compartment a bit difficult. (Of course, one could substitute these supports with pieces of wire... 😉 ). Tracks, wheels and their supports are printed as whole units as well. No transparencies, no decals, of course... Recommended! 😉
29 October 2023, 20:10
"mirror mirror on the wall...what the heck has gone 😉"
24 November 2023, 14:20
hey Robert, very nice compilation and there are also a few really rarely seen models.
I also saw the trouble with the decals on the beautiful Buffalo.
I'm excited to see what else ends up on your table👍
17 March 2024, 15:14
Thank you, Kyriakos! You've inspired me to finish the MiG-15 in USAF markings 😉
17 March 2024, 20:33
Very nice inspirational collection. I enjoy browsing through the album. 👍👍
The model in photo 21 and 22, is this a Peugeot Char 1918 37mm tank in 1/72 scale ?
15 April 2024, 08:38
Thank you, Bohrmann, much appreciated. Yes, it is Peugeot Char (3d printed kit from Polish company: Peugeot Char 1918 37mm (Play..hnology) IDA-PMI0139B, 1:72))
 IDA-PMI0139B)")
15 April 2024, 14:01
It is a "Box scale" item, Łukasz 😉 No info on the box - some Mates here described it as 1:144 scale model...
11 June 2024, 11:21
Thank you, Alec. I am not the fan of the story, but I needed to build something quick & easy...
11 June 2024, 16:38
Nice! I really like the Naleszkiewicz JN-1 tailless glider.
(Yes, I did have to look in your 'completed kits' to find out what it is. 😳 )
6 December 2024, 11:56
Thank you, Gorby! (I suppose most of modellers from Poland would not know it either 😉 )
6 December 2024, 12:39
that is certainly a unique model... i am sure gorby is already thinking about getting one already 😉
6 December 2024, 13:05
Thank you all, Mates, for your kind words, I feel honoured 🙂
@Łukasz - on the one hand, this is quite a well-designed and detailed kit, and you even get pre-cut masks for the cabin transparencies. On the other hand - the whole cabin/fuselage part is made of transparent plastic, what makes fitting and glueing the interior parts a bit troublesome. Joining both halves together is tricky too, as the glue must be strong (and there is a risk of fogging when you use a CA glue). Decals have extensive carrier film, are very thin, and grab the surface immediately with almost no chance to correct the placement. Final verdict: recommended 😄
6 December 2024, 13:43
Thank you, JJ and Alec 🙂 @Alec - actually it was the main reason why there existed only a prototype of this glider 😉
6 December 2024, 16:10
Thumbs up for the new (glider) addition... It just HAD to be a part of your collection! 👍 👍
6 December 2024, 22:00
Thank you, Alex! (You know me better than I do myself 😉 )
7 December 2024, 08:26
With another background the glider in pic 58 would look real! Clean work 👍
1 11 December 2024, 10:56
Thank you very much, Bughunter! You are too kind to me.
11 December 2024, 17:39
Now, dear Robert, after your latest glider... wouldn't it be great to follow up with this kit (that, not surprisingly, seems to be in your stash)? - Armstrong-Whitworth AW-52 (MikroMir 72-016, 1:72)
")
1 12 December 2024, 02:55
Thanks for your suggestion, Alex (and kind words 🙂 )... So many models, so little time... Yes, I have this kit on my shelf 😉
12 December 2024, 06:24
In the meantime I've assembled a wee Albatros in unusual livery. I hope you'll like it 😉
9 February, 16:15
Wow, that's tiny 😮 Never understood the idea behind this fake USAF Albatrosses (or aren't they fake?)
9 February, 16:41
As far as I know, this one was really tested by USAF at Edwards:
aftc.af.mil/News/On-..t-test-pilot-school/
9 February, 17:08
This is perhaps the only Eastern-Europe developed warplane tested by USAF that was not the spoil of war (or a defector's plane)...
4 9 February, 18:04
The latest addition in photo 74 looks great although I don't know what it's called. As you build some very obscure aircraft it might be good to give their name with the photos. 🙂
6 April, 13:31
Thanks Robert, that helps. Now I can confidently say that I like the Japanese one which I can't pronounce. 😄
1 6 April, 14:51
LOL 🙂 I needed to assemble a few 'easy' kits to ensure myself that I am able to finish a model (I am a little frustrated with the Lesher Teal...)
1 6 April, 14:55
Haven't been here for a while, the latest updates look very good. What is this Cadillac kit?
6 April, 19:37
Thank you, Łukasz 🙂 It is a 3D-printed kit from Red Tank Miniatures (purchased at bargain price 😉 )
1 6 April, 19:50
Hey Robert, great compilation in the usual high quality.
Very nice to look at.
The Little Albatross l-39 Trainer 1/144 is great.👍
6 April, 20:15
The collection has grown some more; I like Kisaragi, although the alien tank is good too.
1 8 April, 23:19
Thank for dropping in, Jennifer 🙂 This "Kisaragi" plane is an interesting case: on the one hand it is just a small, simple liaison aircraft, but on the other there is somethig "special" in its shape and proportions... 😉
1 9 April, 05:18
Chciałbym mieć taką kolekcję. Na razie moje latadełka czekają w pudełkach... Super!
1 10 April, 19:48
Some really nice models - and great variety! Great job working in this scale, you're a master at it!
1 18 April, 17:02
a adăugat un nou photoalbum.
6 imagini
1925 Ford Model T Chopped. 
1:25
The cool box, going to be framed.


Proiect: 1925 Ford T Chopped

2 18 April, 20:53
a adăugat un nou photoalbum.
6 imagini
Heinkel He 162 Salamander
1:48
Les décals ont étés collées et les pièces ont été vernies mat


Proiect: Heinkel He 162 Salamander

3 12 April, 12:44
")


a adăugat un nou photoalbum.
10 imagini
1/72 UM Sd. Kfz. 140/1-75 38(t)
1:72


Proiect: 1/72 UM Sd.Kfz. 140/1-75 38(t)

6 18 April, 01:12
a adăugat un nou photoalbum.
14 imagini
1/72 UM Sd. Kfz. 140/1-75 38(t)
1:72


Proiect: 1/72 UM Sd.Kfz. 140/1-75 38(t)
4 17 April, 17:42
Spelling should be corrected to "Constructor" in this Topic:
SCM Topic: Autocar Construcktor
SCM Topic: Autocar Construcktor
Implementat
1 19 April, 03:26
"Construcktor" is the correct spelling for this truck.
google.com/search?q=..=chrome&ie=UTF-8
2 19 April, 08:15


a adăugat un nou photoalbum.


41 23 November 2024, 16:21
Beautiful MiG-31. The MiG31 really comes into its own just by showing it in flight with the right flight angle. Fantastics.
23 November 2024, 19:32
First Rate!, that is some stunning painting weathering highlights, very realistic.
19 April, 14:56
a adăugat un nou photoalbum.
4 imagini
SAR Special: 1/48th Academy KV-107 Converted to CH-113 Labrador
1:48
Academy's CH-46 series was well received when it was released around 2005. External details are nicely done with finely-...


Proiect: CH-113 Labrador

6 19 April, 13:49
Looks Great, this one has been in my stash for a looong time so some good inspiration here.
19 April, 14:53
a adăugat un nou photoalbum.
72 imagini
Going Downtown
1:48
Still not 100% correct regarding panellines but looking more like the real thing.


Proiect: Going Downtown


 19+
19+ 20 1 April, 16:18
count me in - I see this is going to be a great reference for my Intruder 👍
1 2 April, 18:51
Nice, this is why my kit is still in the stash, it needs a lot to make it a realistic A model. Great work.
1 9 April, 15:23
Interesting to watch, and to hear/see what you're doing on this kit. I'd always heard that Hobby Boss' A-6 were the best in 1:48, and much preferable to Kinetic's. Seems it still needs a bit of work!
1 9 April, 19:18
It looks way better than the Kinetic kit. Revell/Monogram are outdated. So Hobby Boss is IMHO the only way to go. And so far I am happy with the progress of things. It's not the perfect kit, but quite doable.
12 April, 06:33
a adăugat un nou photoalbum.


28 28 December 2024, 05:16
"Removing seams from roadwheels the Jakko way." Thanks for the shout-out 🙂
Though TBH, I find it takes about as long as clamping the wheel in a vice and scraping the seam down — the lathe is less effort but not really a timesaver, IMHO. Could be that's down to my lack of lathing skills, though.
15 January, 09:46
It took a long time but it's fun. Not every day I get to use a lathe.
1 15 January, 13:51

As the kit is missing many parts, l will try 3d printing / scratchbuilding the missing parts. My resin printer isn't a very good one so it can be hard to get things to print correctly.
28 January, 05:31
Quick tip: you don't need to take photos of your screen — press ⇧⌘4 instead 🙂
28 January, 09:57
There is a lot of work to do to remove the supports. I did a quick and dirty pass on one side and it fits perfectly!
I scaled running gear and tracks from a 1:56 stl by 175% to get to 1:32 and it fits properly.
28 January, 23:25

All missing parts 3d printed by upscaling from 1:56 to 1:32. Suspension and tracks won't be glued on til after painting. Same with radio antenna as I'll just break it off if I add it now.
6 March, 03:05
I see you manage to do 3d printing 😮 lucky you. The tracks and bogies look wonderful 👍
1 16 March, 22:56
Pretty soon, with 3D printing, the only limit will be our imagination.
1 17 March, 19:53
That, and the time and effort you want to put into learning how to use the software and the printer … Both of which are what's kept me from wanting to do this myself 🙂
17 March, 21:07
Got kind of an acceptable gloss pink outcome. Respect to the car builders I see on here who put down perfect gloss coats!
2 20 March, 12:32
Painting the one part track and suspension takes a lot. I have literally worn out one brush so far, scrubbing in all the nooks and crannies.
30 March, 02:24
Like it, like it. Down to the leopard print blanket. Aerosmiths Pink is now my earworm. 🤘🥸👍
17 April, 17:12
That's part of my problem with it 😛 I don't like it AND it sticks in your head …
18 April, 08:39
Welcome to my earworm along with The Bird is the Word (thank you Family Guy 😫😵😵💫) I do find playing Motorhead at extreme volume seems to help. . . . . Pardon? 🤟🥸🤘
2 18 April, 11:09
I would have better off filling the holes for mounting the tools and cutting the pins off of them.
1 19 April, 02:37
I really want a cotton candy... 😛
@ Mark : Listening to Motörhead at extreme volume helps with everything...don't forget "Lemmy is god" 😄 🤘🏻
2 19 April, 05:16
Motorheads okay but I'd rather listen to Black Flag. I'm more hardcore than metal.
19 April, 11:41
Me being my age, late sixties to the seventies and a smattering of eighties, nineties, noughties and beyond (cue Madness) 🤟🥸🤘 and the Grant/Lee is looking good in Pink. 👍
19 April, 13:31
It's fun, and I have a lot of nostalgia for this kit. It is one of the kits I built relatively well, when I was a kid, given my resources. One fun thing I enjoy is the periscope moves with the main armament. Anyhow, it's been enjoyable to build this kit again, and kind of go off the beaten path. I thought about giving it a pin wash but it's an anime tank and I think it should just be glossed out.
19 April, 14:15
I did the best I could with it, I did a lot of practicing, and I need to do a lot more to get better fine airbrush control. This project helped me learn a lot about gloss coats.
19 April, 14:25
a adăugat un nou photoalbum.


26 3 February, 19:23
Oh no, I leave the site for a few days and attract onlookers! 🤣….will post some shots soon…the detail's good so far for 72nd….
10 February, 23:48
I guess the observer may need some massage treatments on his back and neck after each mission🥹🥹🥹 following
1 11 February, 02:28
@Lorraine, yes - these planes weren't built for comfort….champagne for every successful mission return though?….
1 11 February, 23:12
I think one of the worst RAF planes for relative combat losses to number flown? Slow and defensively weak. I never built this as a kid, so intrigued by this offering!
12 February, 20:48
Andy, despite this, it will look great in the display case 😉
Nice interiors 👍
1 13 February, 19:30
Let me find a chair for this one. I don't know if helps any but I find in a pitch painted tamiya masking tape works well for seat belts.
1 17 March, 05:02
Good evening Villiers, Dave and Nicolas…
Dave I admire your comment on seat belts but one has to keep the global wine industry going with a foil capped harness…photos to come!
3 19 March, 23:41
Thanks Nicolas and others, just put some more progress shots on this project. The fit is up there with Tamiya and very intricate detailed parts. Similar to the Hobby Boss Sunderland. But clearly the best Battle in 72nd
1 17 April, 19:31
Somehow I missed the beginning, but from now I will follow your build-log with pleasure and interest, Andy 🙂
17 April, 19:45
Thanks Robert, Alec, Cuajete, and David, glad to have such discerning eyeballs on the build!….managed to lose the front windshield- so trying their customer service to see if there's a replacement service….🥴😞
19 April, 14:42


cults3d.com/en/3d-mo..echute-for-f-104-egg
")
brakechute box for F-104 Startfighter for Freedom Models F-104
WoS-3D 1:Egg
WoS-003 2001 Instrumentul nou 19 April, 14:37
cults3d.com/en/3d-mo..f-104-egg-wolf_spoon
")
Air Brake for F-104 Starfighter for Freedom Models F-104
WoS-3D 1:Egg
WoS-002 2001 Instrumentul nou Digital: Fișier de date 3D19 April, 14:34
a adăugat un nou photoalbum.
6 imagini
Be-Devilers: 1/48th Hasegawa F-14A+ Tomcat
1:48
The 1/48th Hasegawa F-14A Tomcats weren't introduced until the late 1980s and were quickly hailed as the best detailed T...


Proiect: F-14A Plus Tomcat

12 2 September 2024, 23:25
a adăugat un nou photoalbum.
7 imagini
Alpha Jet A/E GE 314 BA 
1:48
Fixing stuffs !


Proiect: Alpha Jet A/E GE 314 BA


7 14 April, 16:11


a adăugat un nou photoalbum.
71 imagini
1936 Mercedes 540K Maharaja Sport Roadster
1:16
Hand painted each wheel cap. After the acrylic paint dried, a very fine-grained sandpaper was used to expose the silver ...


51 20 October 2024, 09:57
The kit shows its age. I hope, with a bit of work will turnout alright.
20 October 2024, 17:00
Will be keeping eye out for updates.
The messy glue tubes, the Beriev lm building came with a little pot of glue that you Peirce with pin on one side 🤣
Long dried up.... I did use it back when l was a kid....lots of sticky thumb prints.
Nice project 👍
23 October 2024, 18:23
Gentlemen, thank you all for your kind remarks. I have been chipping away slowly. The part count of the kit is not that high, but the version I chose as well as the paint scheme results in a lot of challenges to my skill level which I thoroughly enjoy.
6 November 2024, 18:55
Hi Villiers 👋
Your doing a good job...it looking really good 👍
Nice kit... who is the manufacturer??
6 November 2024, 21:14
👍 Thanks Villiers ...l like to look different manufacturers up n see there range 👍
7 November 2024, 13:53
Heading towards being a nice model this one, like the engine and interior work.
Good little kit 👌👍
8 November 2024, 16:59
Thank you Mr. D for your comments. The kit certainly shows its age. I remain a sucker for the larger scale classic cars.
12 November 2024, 03:02
Oh, This manufacturer I've never heard before.
I don't think it will be easy. 👍
24 November 2024, 11:32
I have experienced several paint disasters. Enamel paint kept on forming scales. In the end I had to strip the paint back several times to the primer level. Progress should be quicker from here on.
21 December 2024, 14:48
Hi Villiers 👋
Glad your getting on track a bit now, do you think the plastic reached with the paint ?
Nice to see it taking shape 👍👍
21 December 2024, 19:45
Hello Mr D
I started off with a primer, Mr. Surfacer 1500 thinned down with Mr. Color Leveling Thinner which came out just fine.
I believe that the paint layers were perhaps too thick working with enamels. I believe that I should do thin layers (well thinned) stretched over more than one day.
22 December 2024, 19:41
Annoying when the hard work is undone! ... Just have to pull it back ....and you done that, hopefully be good going forward 👍
I only use water based acrylics, Humbrol and Deluxe gloss dried nice n hard after few days, some of the other brands are bits soft!!
I've had to many dramas with Enamel 🤣 but l expected it's a better option for a car ?
I mainly use Vallejo, AK and recently been using the new ICM paints (very impressed 👍)
Did you have to do some Chrome n conducive paint striping on this one ?
👍👍
23 December 2024, 00:30
@Lorraine ...yes and the glue had a habit of going everywhere but on the model 🫣🤣
Looking nice Villiers 👍 taking shape now,l ike the leather tone of the leather seats 👌
1 19 January, 13:01
Your car is really taking shape, love colors you have chosen. As for the tube glue, i remember as kid thinking that getting a model kit with supplied glue was great until you open it. (That was the first mistake)
2 19 January, 14:23
Getting Leather to look right is not easy " But you more than succeed on the door cards"
Doing some nice work 👍👍
1 25 February, 16:41
The Mercedes is on its own wheels at last. I am now tackling the light clusters.
15 March, 16:32
Thanks for documenting the surfacer process. Looking very nice too!
1 15 March, 16:35
Looking great Villiers 👍
The Tire's look very original and radiator grill turned out very good.
How do you get on for the Hood/bonnet hinge??
Nice work 👏
15 March, 18:47
Thank you Jennifer and Mr D.
Mr D, it is a real hinge supplied with the model. See photo 36.
1 15 March, 19:20
I love the egg carton idea! Absolutely ingeniously!
Great work on the model too.
1 2 April, 12:24
Gentlemen, thank you for your kind comments.
I hope to stick a fork in this project by the end of this weekend.
2 April, 13:47
Amazing step by step process! I love your technique for painting / reducing the fine detailed caps - absolutely brilliant!
15 April, 18:56
The caps worked out beautifully; I will have to remember your technique.
19 April, 14:18
a adăugat un nou photoalbum.


64 1 December 2024, 19:43
Some of the detail work I see on 1:72 kits on this site is unbelievable - this is another one - fantastic work Davy 👍
4 December 2024, 20:25
I like your serious approach.
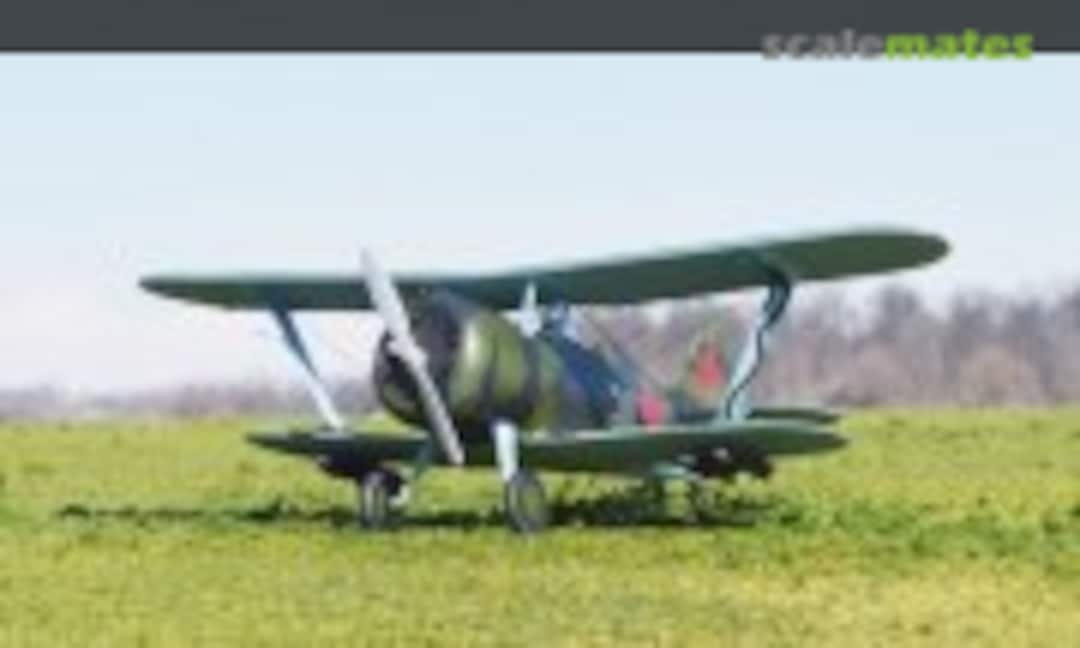
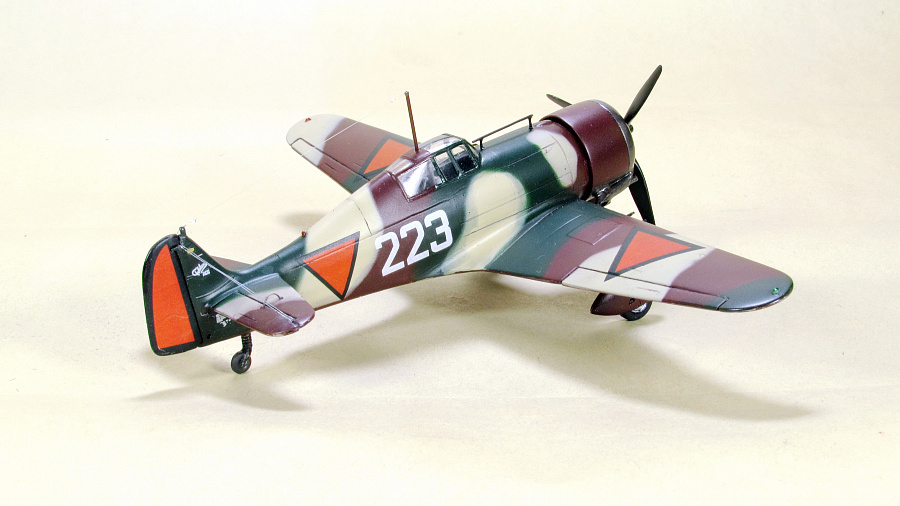
I have assembled two Fokker D.XXI 1/72. One of them was converted from the Novo set. The second one is from Special Hobby
[img1]
[img2]

4 December 2024, 20:50
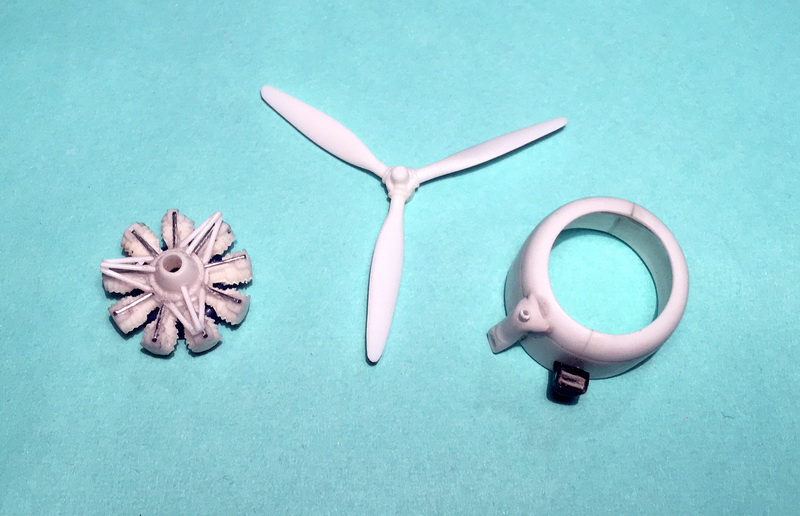
My version of the engine and hood. I took the details for revision from the Blenheim model Novo.
[img1]
[img2]
[img3]
4 December 2024, 21:04
Thank you very much every one! And looks really great Denis! 👍🏻👍🏻
6 December 2024, 21:49
Fantastic work on the interior. The exterior paint work is also very good.
14 April, 20:12
Your seatbelts really came out nice for this scale. Kind of amazing. You're a wizard.
15 April, 15:02
It looks really good, congrats for this amazing result 🤗
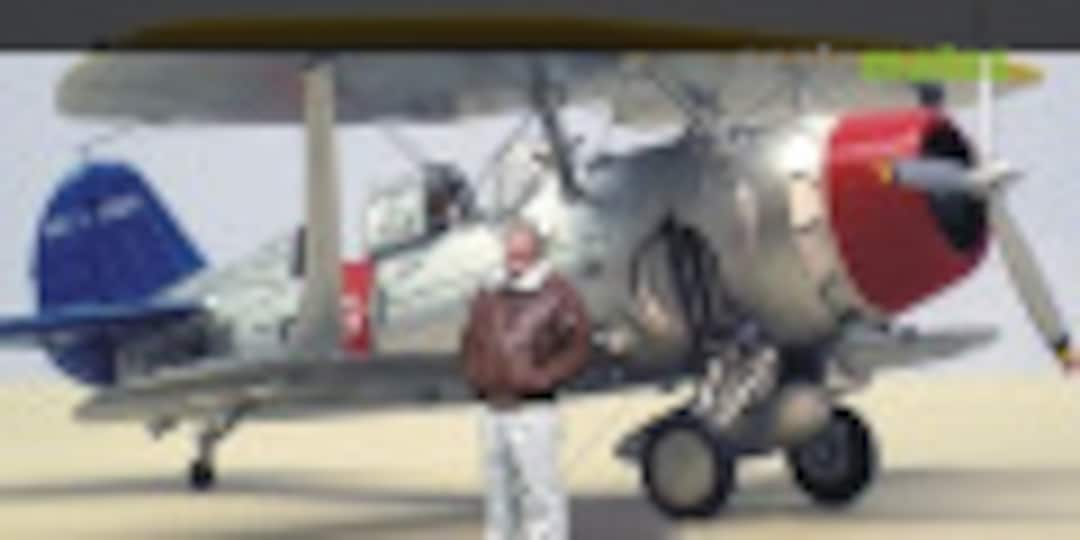
Love this airplane, built my version 2 years ago but in 1/48 scale
1 15 April, 20:08
/ro/search.php?q=*&page=newsfeed&fkSECTION[]=Newsfeed
search-solr.php?lang=ro
35
35
/ro/search.php?q=*&page=newsfeed&fkSECTION[]=Newsfeed
35
todo