
Newsfeed-
a adăugat un nou photoalbum.


50 29 August, 17:57
So I just finished this little Italian job. The decals came out with a lot of the edges showing, which then got a lot worse when I added some washes. I used Microset on the decals, and then sealed them with Tamiya semi-gloss before the washes, but it actually looks like the washes got under the decals. Any thoughts?
29 August, 18:04
It looks like you haven't spray gloss coat before you applied decals. Or decals didn't set well. There are two solutions. One is lacquer thinner. Put the thinner with fine brush in dots over the place where you have silvering. Thinner should destroy the film. If it raises paint under, just leave it, it will settle back. Important thing here is that, once you applied thinner, you shouldn't touch decal for something like 20 minutes, at least. Second way is mix of sugar and water, half - half. You make a hole with a needle on the decal, than you put mix on the top. It should enter in the space between decal and paint and, when drayed, make a gloss film in between them which will act as a gloss under the decal. Wipe excess mix with wet cloath and you are done.
29 August, 18:28
How annoying. I've never heard of the sugar water trick from Bogicevic. I'll be interested if this works. If the thinner, sugar trick fails, what else can you do but use a scalpel to cut around them, since you've sealed it,
29 August, 19:05
Thanks mates! I believe Bogicevic is right. I think I did fail to gloss coat before the decals. I think I'll try the sugar water first
30 August, 10:42
Ok. There are few small tings I should add then. Heat the water first, when hot it will disolve sugar beter and apply it while it's still warm, it will have more viscosity. Make small hole or slice with modeling knife, put few drops of mix on the top and let it dry. You will see emidiatly if it's penatrating. When dry, wipe carefully excess mix with moist cloth. Repeat where neaded. I know it sounds ridiculous, but it worked for me many times.
30 August, 11:11
Thanks Bogicevic! I'll give it a shot. If it doesn't work I'll try the lacquer thinner technique. I love this site!
30 August, 11:26
Where the *uck's this been hiding. Very nice build Mr Mango and I hope the decal solution from Bogicevic work's out🤞
31 August, 21:31
Thanks Mark! So I punched some holes in the decals and applied the warm sugar water, but unfortunately it did not seem to make a noticeable difference. I decided my best shot was to just grab the scalpel and remove the decals, which was very easy. Bogicevic said the solution would get under the decals! I have successfully applied new decals, and my little Italian job is now base-worthy. New pics to come.
31 August, 23:14
Well, you find a solution, which is the most important thing. I can not know why something that worked for me many times does not work for you in this case. Maybe that what I think is silvering is residual glue from decal paper. Who knows... Anyway, good luck with your project.
31 August, 23:56
All's well that ends well. 👍 Mango, your builds have me hankering to do some armor but I still have commitments to do a couple more a/c. When I do get a chance, part of me wants to start small with a Pz IV, but another part says go for broke and do a Maus!
1 September, 01:33
As promised, new pics of the new decals have been added, along with pics of the work I have started on the base. Once again, thank you for the help Bogicevic!
12 September, 15:01
More work on the base. Just need to paint up the base and add foliage
13 September, 22:54
Thank you all! The palm tree is badass, but I can only take credit for the placement. I got it off an Ebay seller from Thailand, Thannan Diorama Exporters. Not cheap, but I had to get one to see if they were as good as they look. They are! Also need to give a shout out to Value Gear for much of the stowage.
3 October, 17:34
Wow, this is fantastic!! The model and the base looks amazing, but that palm tree really pulls it all together in an extra special way. Well done!
3 October, 20:57
aww man I thought you was a next level tree maker - i was gonna hit you up for hints
4 October, 05:02
I sure hope one day my models would look half as good as your work sir 🙂
4 October, 15:20
I enjoyed the discussion of fixing decal stuff as decals are always hard for me. One thing to add, I have been adding tamiya gloss clear (X-22) to my paint mixtures when I paint tanks. This gives the finish a slightly more glossy surface and I find I can do decals and pinwashes/oil washes without a separate gloss coat, and I do a flat coat after to dull the surface. I first tried this on my M3 Lee build. I should take better pics of that one. I think I got the idea indirectly from uncle nightshift (someone told me it was in one of his videos, didn't see it myself). I don't get joy from spraying endless coats of clear on models, I find it's hard to get all the nooks and crannies, so mixing the clear with the color coat makes it easier to see what I'm doing. Maybe an idea for the future.
That's a cool little Italian tank and the diorama is great as well! Thanks for sharing.
15 October, 14:40
Thanks for the tips and comments Ben! I have always been hit or miss with decals. Sometimes they come together like clockwork, and sometimes it's a hot mess. This M13/40 is a perfect example. First set of decals required a full do—over, but the second try went off without a hitch. Sometimes the decals aren't so good, but more often than not I think human error is my problem.
15 October, 19:44
yo mango i hate you man - just spent the last few days looking on ebay at Thanan dioramas - they are good makers - surprisingly quite reasonable prices - i gotta ask thou did freight cost an arm and a leg? i may have to splash out on a palm tree too.
16 October, 03:27
")
vrea acest articol
")
Modern U.S. Air Force Set 5 B-52H & B-1B
Pit-Road 1:700
S79 2024 Notificări noi Subiecte multiple (2)16 October, 03:17
a adăugat un nou proiect.

1 6 October, 10:10
I have this kit from way back. I am waiting for my skillset to get better to tackle it.
12 October, 02:37
Oh Yes Bill...i am not a truck builder, but i thought, my skills are good enough to fight it. That was a hard way, to complete that kit.
Because i remembered the Truck from my childhood on a poster in my room, it was a wish, to build it till the end.
I will load up pictures asap. It is ready...without decals.
15 October, 07:33
")
")
")
a marcat acest articol drept comercializabil / vândut
")
30 September, 18:25
As written on my profile, I am from Belgium but work in Japan. This kit is in Japan, but I have one for sale in Belgium too.
4 October, 06:14
")
a marcat acest articol drept comercializabil / vândut
")
Prețul nu este încă furnizat
16 October, 03:09
")
")
")


")
")
")
")
")
a adăugat un nou photoalbum.


64 8 November 2023, 21:10
This project will have both pilots on the intercom and watching the engine startup process. That is why the same type figure is used in both cockpits. They both monitor the engine to ensure that the EGT and RPM is increasing appropriately. Each has their hand on the control stick to be able to open their MIC as they confirm everything is normal at start. The plan is to have the aircraft loaded with a Nuke (Apache Cruise Missile?). Seems appropriate to me for the days we live in now...
8 November 2023, 22:16
Maybe go for resin seats as well?
Seems like kit plastic never can compete with resin seats. 🙂
Though, I no longer crave for resin interior for the cockpit because of the work, but seats are ok.
9 November 2023, 05:17
I'll paint these up and see if I can tolerate them. If they are too bland, I have time to change my mind! Thanks for the idea!
9 November 2023, 21:25
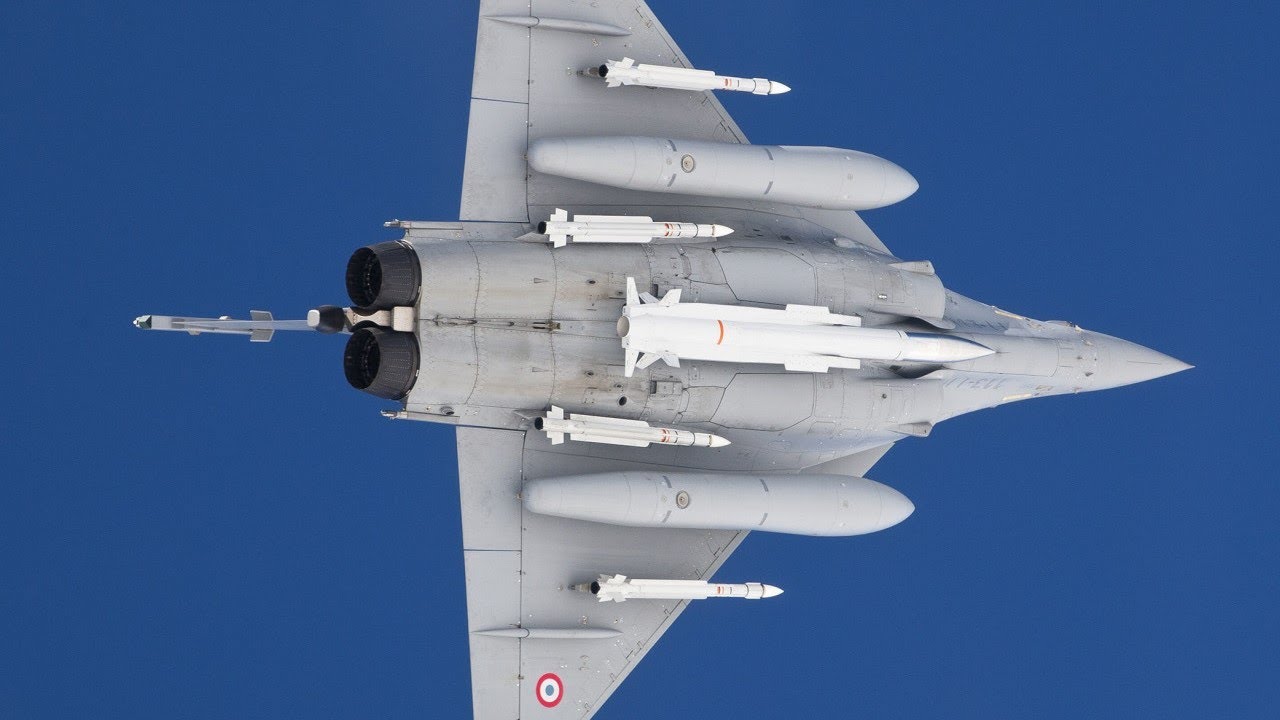
Great video of the weapon that goes with this version of the Mirage 2000N
Youtube Video
25 November 2023, 00:46
As I have begun work on this kit, I am yet again struck by the lack of information in the variations and options provided in the kit. For example, the tail tip is not called out that applies to the 2000N version. While the nose of the 2000D is provided in the kit, it has to be modified to make it correct for the 2000N. Oh bother…
20 July, 02:40
Selected "most appropriate" tail tip and mounted the correct nose to fuselage.
21 July, 20:04
Okay, now I'm excited to get some paint on this cockpit!!! ResKit, you guys have done some great work with your 3D Resin Printing!
16 August, 18:29
Oh, did you fiddle with the nose part to make it match the N version, or did you have to buy aftermarket nose for the N version? I have this kit in my stash, but haven't really looked any it yet.
28 August, 05:43
I'm using the D nose but converting it to an N version. I'm also closing the "sucker doors" on the inlets to represent an engine that is not yet started... I'm assuming initial hydraulic power is applied from the APU and auxiliary hydraulic pumps have brought the gear door up. I'm going to close the speed breaks for pre-engine start configuration...
28 August, 17:36
Looks like BAM has some corrected noses still need the N one. Maybe reach out to him. I could use the corrected nose for this kit also. The Reskit stuff looks amazing.
bam-models.com/produ..2000-corrected-nose/
30 August, 13:57
Thanks for the heads up! The BAM nose looks fantastic! Sadly, the 2000N nose has a pitot tube and does not have the RDY antenna lines. It seems that much of the 2000N systems are somewhat earlier than the -5 systems. Everything I can find on the 2000N seems to be somewhat austere compared with the 2000-5. The ResKit cockpit is worth every penny!
30 August, 14:59
Like it 😀👍
Nice when the pilot looks like he's actually doing something and engaged with the craft.
30 August, 15:22
Thanks. It's really sad to remove detail from the ejection seat, but that is the only way to get the pilot in place...
30 August, 22:47
The pilot is from REEDOAK. They have several different figures in various poses so the realism can be developed based on the aircraft scenario. This model is being build to represent events just prior to engine start.
31 August, 01:50
Remaining cockpit items:
1. Glass
2. Decals on seats
3. A little more weathering
4. Fix pilot's France Flag
5. Add WSO's Right shoulder patch
6. Check that I can get the canopy actuators in after everything is assembled...
7. Add HUD glass
1 September, 03:07
The glass and HUD went in great! I had to lightly sand the edge of the glass to get it to fit snugly into the ResKit frame between the front and back seats. I used 1000 grit and lightly buffed all the way around the edge. Fits perfectly!
3 September, 16:01
Cockpit is done! Looks like the ResKit cockpit tub fits perfectly! Lots of trimming to get the crew in the proper fit. Right now, I think it's ready for final checks before fuselage join. The forward control panel needs some sanding for fit, but it does work. I have left the seats, pilots and control panels loose until final fuselage join just to have "wiggle room" before closing. I was able to adjust the forward control stick to make it match the pilot's hand more closely. Just need to check a few more things and then join the fuselage halves!
4 September, 22:19
attention aux couleurs sur les notices kinetic etc , certaines sont fausses!
5 October, 11:29
The pilots look like they are impatiently waiting for you to finish the aircraft so that they can fly!
6 October, 00:31
I got the canopy frames in the mail. The "detchord" in the forward canopy is perfect!
14 October, 21:27
Done a really smart job on cockpit n pilots 😁👍
It will be show peice of the Aircraft so worth the effort,
Did you have decals for the green display screen's ??
14 October, 21:43
")

")
")
")
")
")
")
")
")
")
")
/ro/search.php?q=*&page=newsfeed&fkSECTION[]=Newsfeed
search-solr.php?lang=ro
35
35
/ro/search.php?q=*&page=newsfeed&fkSECTION[]=Newsfeed
35
todo