Scalemates Schwalbe Group build 2021 WIP

Started the cockpit, pretty satisfied with the kit so far!

Finished the cockpit and pilot. Finding the correct colors and painting these tiny areas was quite difficult!


Assembling the engine nacelles was no problem, but attaching them to the wings was. I had to remove a lot of material to attach them without producing huge gaps or asymmetry.

No comment...

Filling the gaps created by the bad fit of the engines

Gaps filled and primer on!

Preshading done. Good thing you don't have to be precise here 🙂

Airbrushed the underside with RLM76 Lichtblau. I'm surprised the preshading is still slightly visible, usually I use too much of the base color 🙂


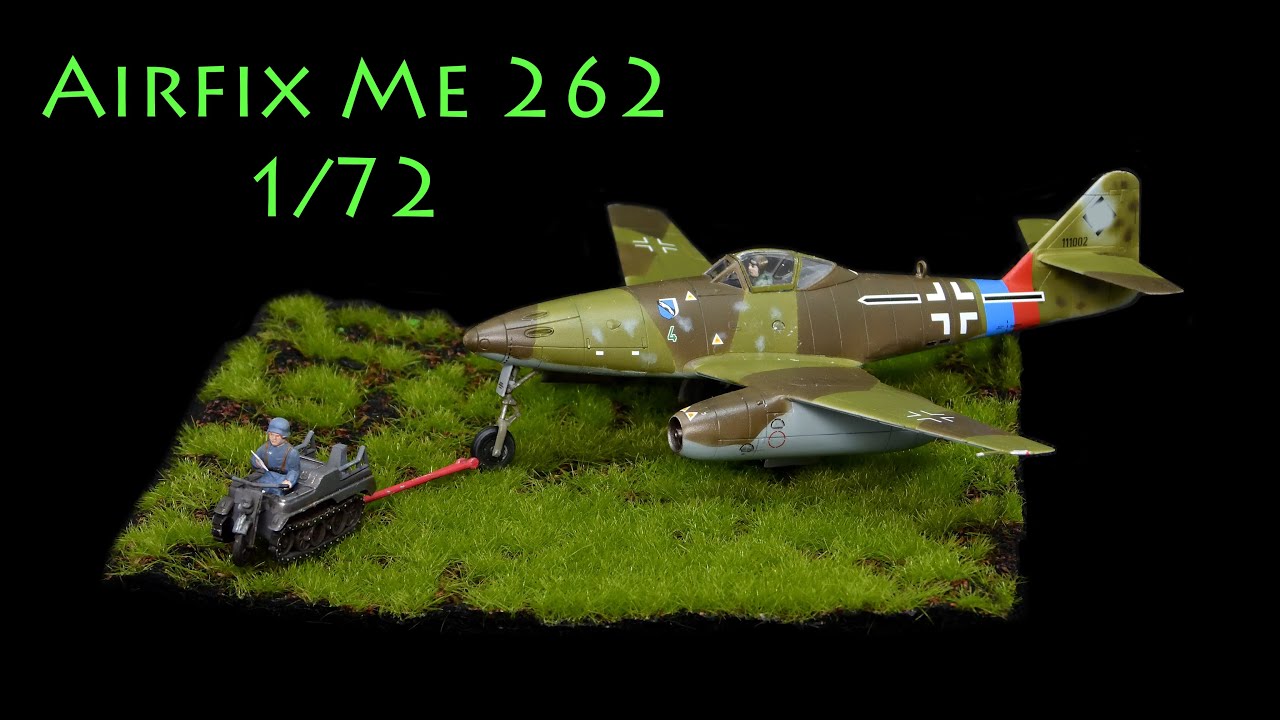
Airfix Me 262 1/72 - work in progress
Finished the splinter camo
Finished the splinter camo

not too happy with my first try on mottling

working on the decals


Hasegawa Kettenkrad 1/72


Comentarii
18 21 April 2021, 09:05
Hi. I'm by no means an expert at this, but you might want to use some masking fluid on the camo in random patterns and then spraying around it all in blue? I'm sure someone more experienced than me can advise.
15 May 2021, 20:55
I studied the mottling topic lately quite deep and ended up with a new airbrush 😉
However this is not the only way - you can either mask it with some blutack (fluid won't give you soft edges)
or use some PE templates available here and there (haven't tested them, but mounting them with blutack few mm above the surface should give you soft edges too).
Hope this helps.
Still the few spots you've got look good, I hope to get similar stuff on my Würger 👍
15 May 2021, 22:07
Thanks guys. I hope the mottling will become better with some more practice. Also I think I should have thinned the paint at lot more for that...
15 May 2021, 22:29
Nice model! I'm always impress by the amount of details people put in 1:72 scale. Great video too.
For mottling I find that adding a lot of thinner tend to make plashing spot. I usually putt the regular amount of thinner. While painting, I purge the dried paint my nozzle on a sheet of paper first allowing a lot of paint in the mix and then apply the mottling spot with a lesser paint to air ratio. I found than high PSI (30) work better for me than lower (10PSI).
23 May 2021, 00:42
Album info